Table of Contents
This is a question many people agonize over before placing an order. You see those cool lighting effects online and really want to try them, but when it comes time to do it yourself, you get stuck at the same point: How do I make it look more creative, not just a simple "glowing line"?
Don't worry — the visual effect of LED strips doesn't require you to know circuits. It's all about how you plan to position and design them. From straight lines on the ceiling to backlighting behind your TV console, to creative personal light shows, every idea is simple enough to start tonight.
In this guide, you’ll discover simple LED strip DIY ideas that can instantly upgrade your space — plus exactly what you need to recreate each look.
5 DIY Inspirations for Different Scenes
Let's be real — a regular table lamp or ceiling light can barely give a room any real "vibe." But LED strip lights are different — they can transform into anything you want, depending on the mood you're going for.
Below are 5 DIY ideas that cover the easiest, most high-impact spots in your home: from a cinema-like glow behind your sofa, to a floating effect under your bed, to that premium soft light behind your mirror...
Each idea comes with a full list of materials you'll need and exactly how to stick the strips. See which one works best for your room.
1. Ceiling Ambient Glow
Have you ever noticed the ceilings in high-end hotels or movie theaters? They rarely rely on a single large light in the center to illuminate the whole room. Instead, they use a soft glow that spreads from the edges of the ceiling or from behind the crown molding — much like natural reflected light from the sky. It’s not harsh on the eyes, yet it instantly makes the space feel more open and upscale.
By hiding LED strip lights behind the drywall recesses of your ceiling, behind crown molding, or even just along the corner where the ceiling meets the wall — pointing upward — the light hits the ceiling first and then bounces back evenly across the room. This kind of indirect lighting completely eliminates the shadows and glare of a standard overhead light, giving your bedroom, living room, or even home theater a floating, airy feel.

What You Need:
- LED Type: COB LED strip (for smooth, dot-free lighting)
- Length: Measure the perimeter of your ceiling (usually 10–20m total)
- Installation Tip: Install inside a ceiling groove or behind crown molding to hide the strip
- Brightness Tip: Warm white (3000K) for cozy spaces, neutral white (4000K) for a modern look
2. Gaming & Desk Setup Lighting
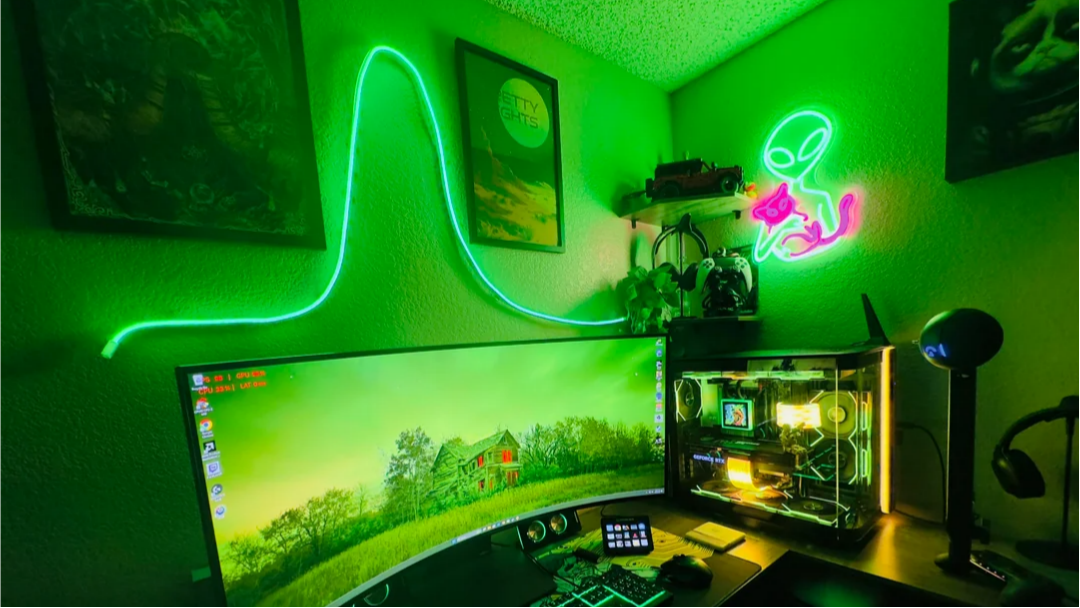
You've definitely seen those desks that scream "gaming setup" at first glance: neon purple glowing from behind the monitor, an ice blue LED strip running along the underside of the desk, and keyboards, mice, and headsets all lit up. This kind of vibe isn't just about being bright — it's about immersion. When the lights flash with an explosion in your game or pulse like a heartbeat as you play music, you really feel like you've stepped into the world on your screen.

For desks and gaming setups, you don't need to light up the whole room. Instead, you want zoned, dynamic, and interactive light. RGB 8mm*16mm LED strips can be easily attached to:
- The back of your monitor (creating backlighting that reduces eye strain and gives a floating look)
- The underside of the front edge of your desk (illuminating the floor or leg space without shining directly in your eyes)
- The edges of desk legs or cable management trays (outlining the shape of your desk)
- The back of a shelf or pegboard (turning your collectibles and gear into silhouettes)
Many LED strips these days also support smart control and can even flash along with the beat of your music.
What You Need:
- LED Type: RGB LED strip (for color effects)
- Length:
Monitor back: 1–2m
Under desk: 2–4m - Installation Tip: Stick behind edges for indirect lighting, and avoid direct exposure
- Extra: Use a controller or app for dynamic lighting modes
3. DIY Neon Shapes
You've probably seen those pricey pre-made neon signs — a glowing "HOME" on the wall, a pink heart, a wavy line, or a short phrase in English. They look great, but they often cost a hundred dollars or more. The truth is, with a standard silicone neon LED strip, you can bend it into any shape you want for less than a third of the price. Plus, since you design it yourself, it's completely one of a kind.

Regular LED strips are flat and can only go in straight lines or bend along a flat plane. But silicone tube neon strips are different:
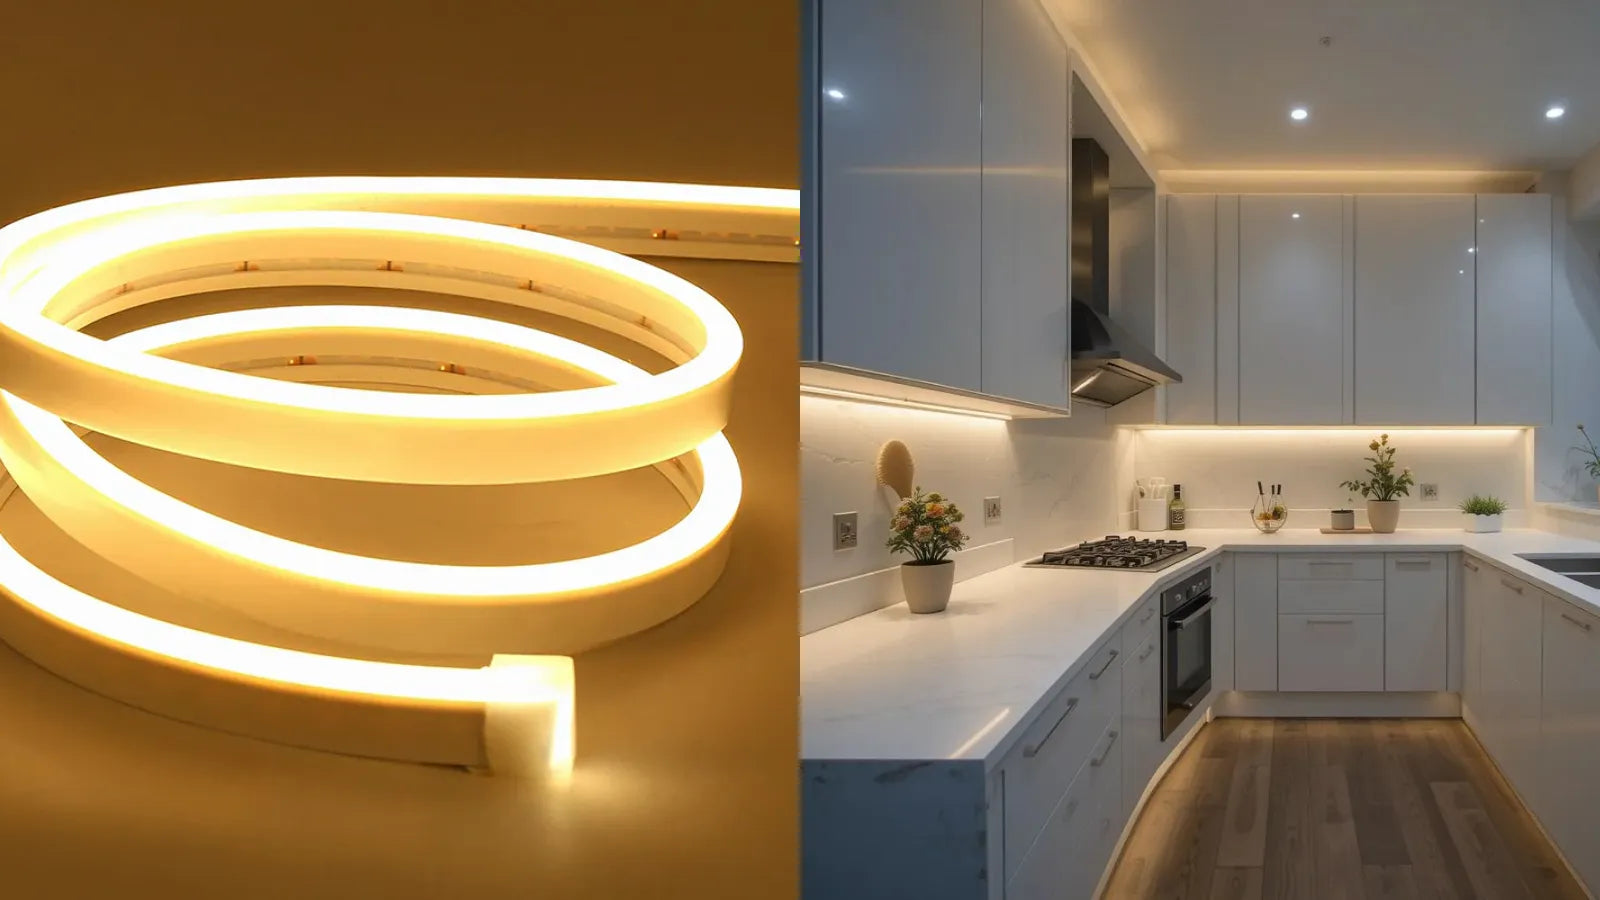
- The casing is a soft, round or D‑shaped silicone that gives off smooth, even light with no visible dots from individual LEDs.
- They can bend sideways, making it easy to shape letters, hearts, stars, animal outlines, or any other detailed design.
- The light looks just like a real neon tube — continuous and soft — so you can stick it directly onto the wall without hiding it behind anything.
All you need to do is:
- Draw your desired shape on paper (or print a template).
- Attach the neon strip step by step along the lines using clear mounting clips or hot glue.
- Plug it in — and you've got a one‑of‑a‑kind neon wall.
What You Need:
- LED Type: Neon-style LED strip or highly flexible COB strip
- Length: Depends on your design (usually 2–5m per shape)
- Installation Tip: Sketch your design first, then fix with mounting clips (not just adhesive)
- Pro Tip: Choose dot-free strips for a cleaner “neon” look
SHOP LAMOMO WATERPROOF STRIP LIGHTS
4. Mirror & Backlighting
Have you ever noticed the mirrors in trendy hotels or beauty influencer studios? They aren’t just mounted flat against the wall — they look like they’re floating in mid‑air, with a soft ring of light glowing from behind. When you do your makeup, there are no shadows on your face. When you get up at night, you don’t have to turn on a harsh overhead light. This "glowing mirror" effect only takes a single roll of LED strip lights — and it costs far less than those so‑called smart mirrors on the market.
The usual ways to backlight a mirror are either buying a pre‑made LED mirror (expensive, fixed sizes) or installing sconces on both sides of the mirror (asymmetrical and space‑hogging). With LED strips, you can:
- Stick them to the back edge of the mirror: light seeps out through the gap between the mirror and the wall, creating a complete outline of light.
- Stick them inside the frame around the mirror: if the mirror already has a wood or metal frame, hide the strip between the frame and the mirror surface — the light then shines evenly from the inner edge of the frame.
- Stick them on the wall behind the mirror: this makes the entire mirror appear to float away from the wall, with a halo of light that’s slightly larger than the mirror itself, giving it an even more premium look.
The best part? The mirror surface reflects the light, so the same length of LED strip gives you double the visual brightness. A small bathroom or entryway instantly gets a makeup‑studio level of polish.
What You Need:
- LED Type: COB LED strip (for even, soft glow)
- Length: Match the perimeter of the object (mirror/TV/bed)
- Installation Tip: Place 2–5cm away from the edge for best halo effect
- Brightness Tip: Soft white or warm white works best
5. Hidden Lines & Architectural Lighting
Have you ever walked into a minimalist home or showroom and noticed what looks like a "slit of light" on the wall or ceiling — a thin, bright line that seems like the wall itself is glowing, yet you can't see the light source anywhere? That effect is called architectural lighting or an indirect light cove.
Unlike regular exposed LED strips, the light is hidden inside structural gaps in the wall, cabinet, or floor, leaving behind only a clean, sharp line. This kind of light isn't harsh or showy, but it instantly elevates the sense of depth in any space.
To achieve this "hidden line" effect, you don't need to renovate or cut new channels. You just need to find existing structural gaps around your home and tuck the LED strip inside:
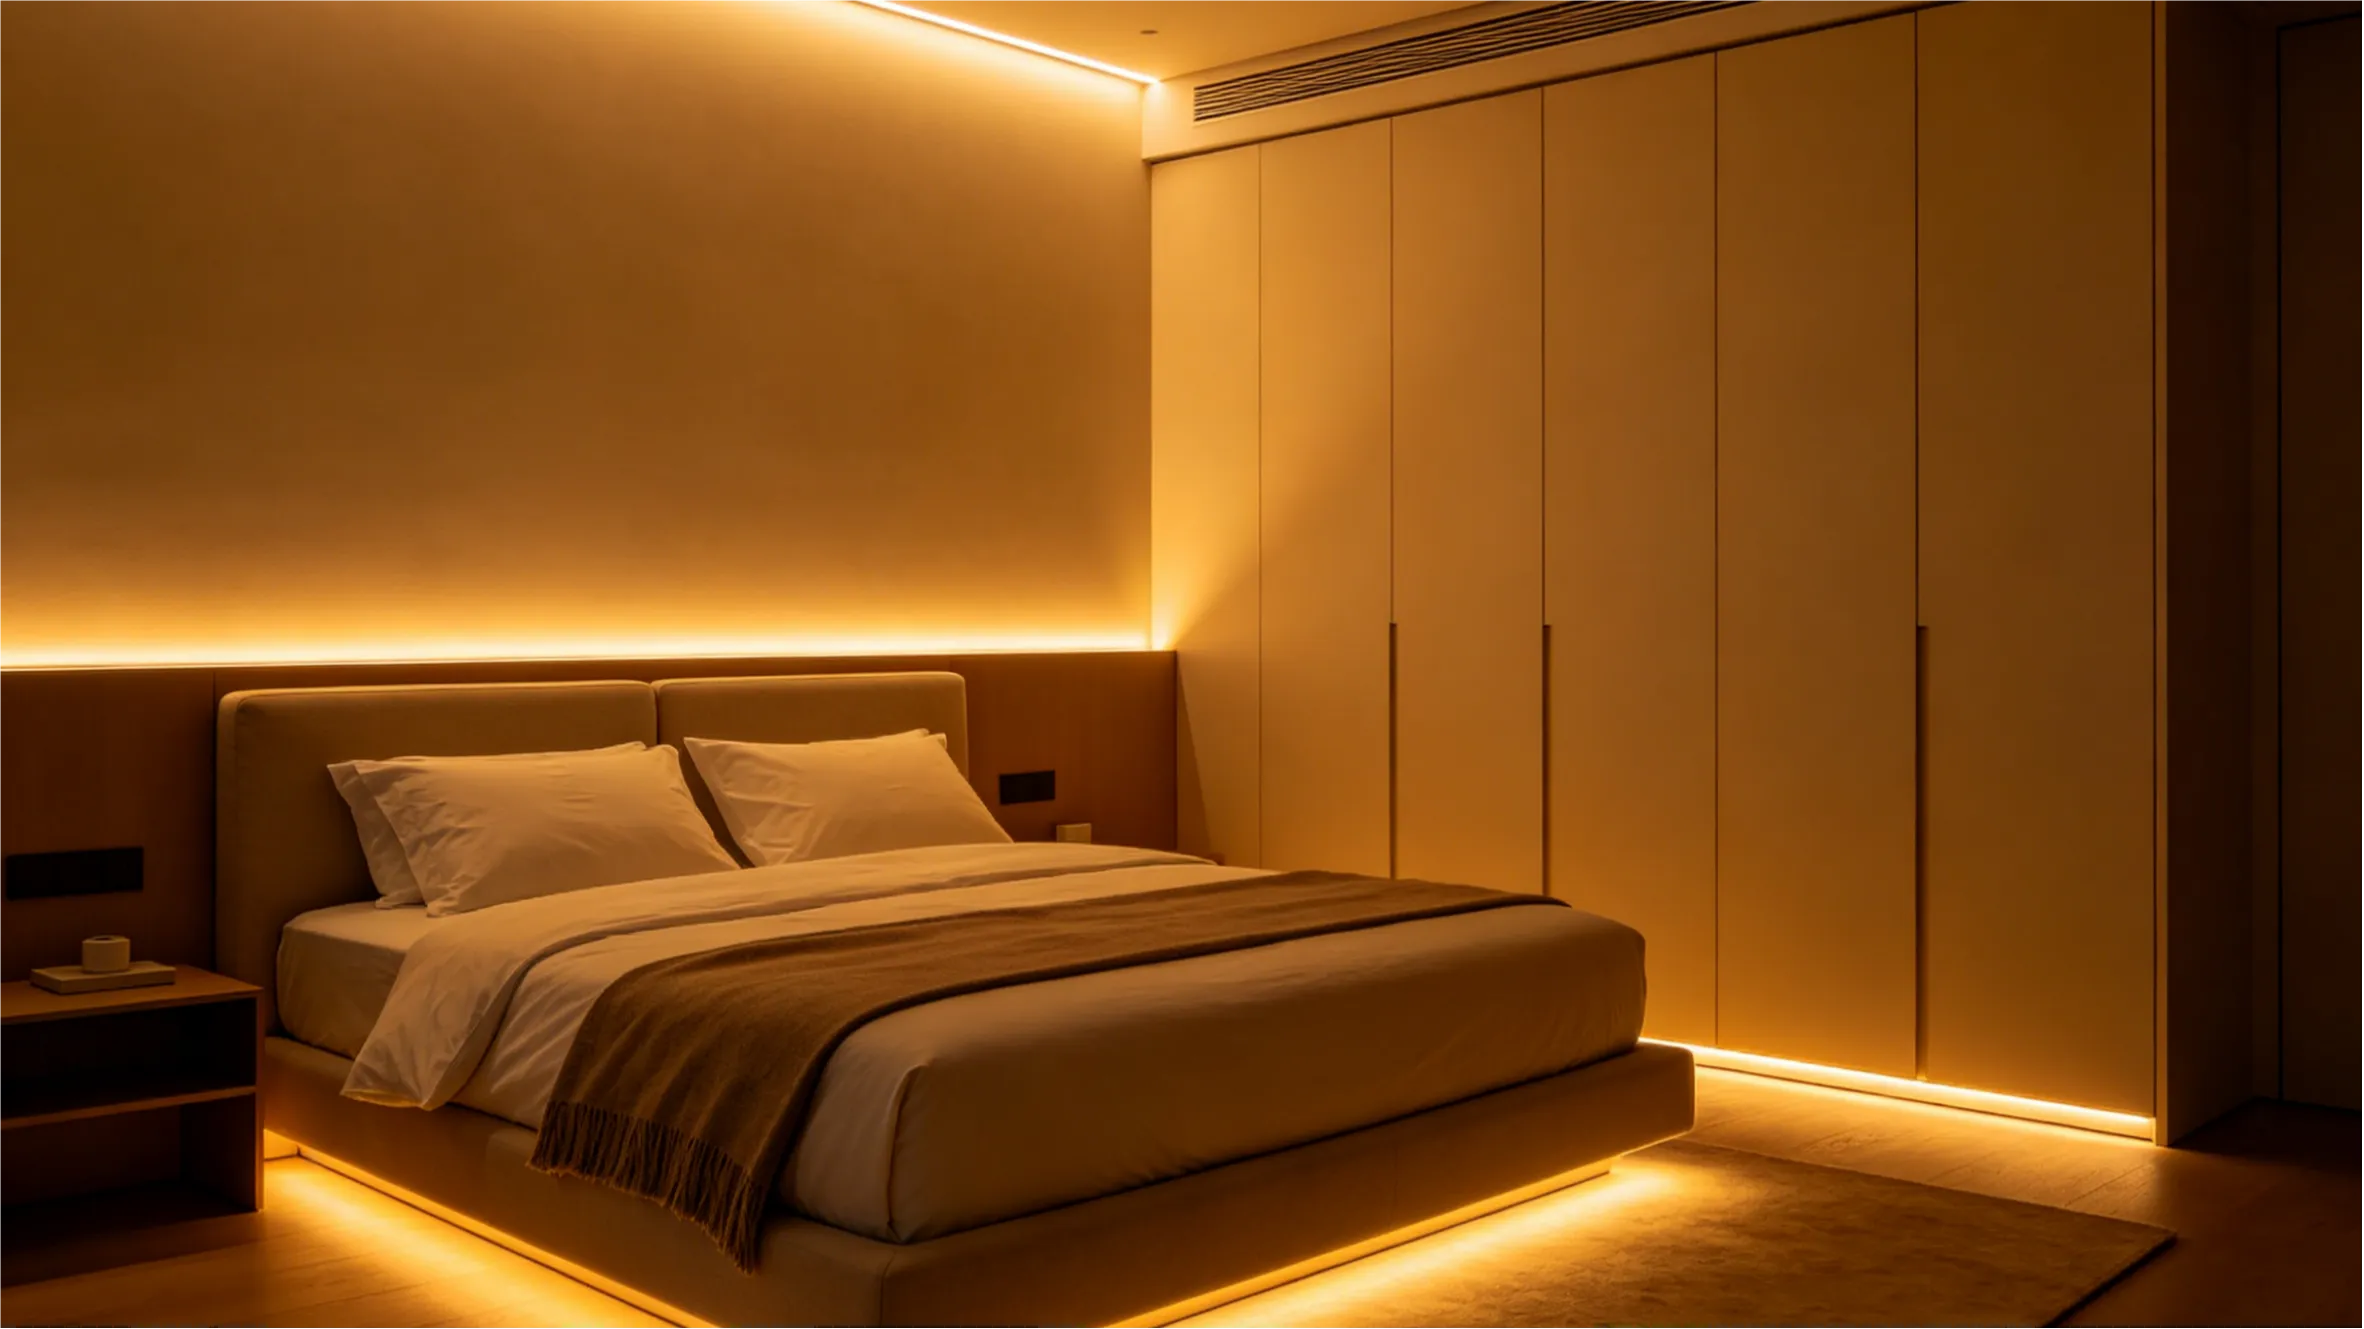
- Between the top edge of your baseboard and the wall: aim the strip upward, and the bottom of the wall appears to float.
- In a recessed gap or channel in the ceiling: leave a ½ to ¾ inch gap between the ceiling panel and the wall, hide the strip inside, and light flows out evenly through the gap.
- Along the side or underside of stair treads: place a strip under each step, and it feels like you're walking on light.
- Between the side of a wardrobe or bookcase and the wall: the cabinet looks like it's separated from the wall, with a built‑in floating feel.
- Behind a padded headboard or wall panel: a ring of light traces the edge of the panel, and your bedroom instantly takes on a hotel‑suite vibe.
The key is that the LED strip itself is invisible — all you see is the light. This "see the light, not the fixture" approach is the secret behind all high‑end lighting design.
What You Need:
- LED Type: COB LED strip (for clean, continuous light lines)
- Length: Depends on installation area (typically 1–10m)
- Installation Tip: Use aluminum channels for a more polished finish
- Placement Tip: Keep the strip hidden to emphasize the light, not the source
Common Mistakes to Avoid
Want your LED strip lights to truly look great? Creativity alone isn't enough. The following three mistakes are the most common traps beginners fall into — avoid them, and your DIY success rate will skyrocket.
1. Sticking it on a dirty surface
Wrong way:
Peel off the adhesive backing and stick it directly onto the wall or desk — without checking for dust, grease, or uneven spots. Two days later, the strip starts peeling off, or even falls down in the middle of the night.
Right way:
- Thoroughly wipe the surface with an alcohol prep pad
- Make sure the surface is completely dry and flat
- For rough walls (e.g., painted drywall), use clear mounting clips with screws or nano tape instead
- If the temperature is low, warm up the adhesive backing with a hair dryer before sticking — it'll hold much better
Note: The built‑in adhesive is only meant for smooth surfaces (glass, metal, plastic, painted finishes). For rough walls, always use mechanical fasteners.
SHOP LAMOMO 120V COB STRIP LIGHTS
2. Ignoring the waterproof rating of the strip
Wrong way:
Using a standard IP20 (non-waterproof) strip near a bathroom mirror, kitchen sink, or on an outdoor balcony. The result? Moisture causes a short circuit — or even an electrical shock hazard.
Right way:
- IP20 – For dry indoor use only (desktops, ceilings, inside closets)
- IP44 / IP54 – Splash-proof; good for kitchens, dry zones in bathrooms, and balconies
- IP65 and above – For outdoor use or areas that get direct contact with water (e.g., around a bathtub, in the garden)
Tip: For backlighting a bathroom mirror, go with at least IP44. If the strip is going under a mirror cabinet near the sink, IP54 is a safer choice.
3. Using the LED strip while it's still coiled up
Wrong way:
Plugging in the entire roll of LED strip while it's still bunched up in a coil. The result: the strip heats up quickly, and the silicone or adhesive backing softens.
Right way:
- LED strips generate heat while operating — they must be unrolled or spread out so the heat can dissipate through the air or the surface they're attached to.
- Even during testing, at least straighten the strip or lay it out loosely; don't leave it stacked or coiled.
- This is especially important for high‑brightness, high‑power strips (like COB, or 12V/24V strips drawing more than 10W per meter) — they need even more attention to heat dissipation.
New to LED Strip Lights?
If you've never worked with LED strip lights before, seeing all those DIY ideas above might still make you a little nervous:
"The Ultimate LED Strip Light Installation Guide for Beginners"
"The Ultimate COB LED Strip Light Guide"
Don't worry — we've covered all these basic questions in detail in two other guides.
"The Ultimate LED Strip Light Installation Guide for Beginners"
From measuring length, cutting, soldering / using connectors, to matching the right power supply and hiding the wires — every step is explained with pictures.
"The Ultimate COB LED Strip Light Guide"
COB (Chip on Board) strips have no visible light dots — they produce a continuous, seamless line of light. They're perfect for "see the light, not the fixture" applications (like hidden architectural lines or mirror backlighting). This article will tell you when to choose COB and when a regular strip is good enough.
Read those two guides, then come back to the five scenario ideas above. You'll find that every idea becomes clear and totally doable.