Table of Contents
After buying LED strip lights, many people run into the same question when they start using them: Can I cut my LED strip? The short answer is: yes, in most cases you can—but different types of LED strips have different cutting rules.
Cutting an LED strip might seem simple—just grab a pair of scissors, line up with the marked line, and snip. But if you cut in the wrong spot, or don't understand how different strips are built inside, you could easily end up with a section that won't light up at all—or worse, create a short-circuit risk.
Different types of LED strips follow completely different cutting rules. Some let you cut freely every few centimeters. Others require you to cut only at specific points. And a few? If you cut in the wrong place, there's no fixing them.
In this blog post, we'll walk you through the most common types of LED strips on the market, plus exactly how and where to cut each one—and what to watch out for. By the end, you'll know for sure: which cuts are safe to make, and which ones could cause trouble down the line.
How to Cut LED Strip Lights by LED Packaging Type
The cutting rules for LED strip lights depend first on how the LED chips are packaged. The three most common types on the market are: SMD strips, COB strips, and CSP strips. Below, we'll break down how to cut each type and the key details you need to know.
SMD LED Strips (Surface-Mounted Device)
SMD (Surface Mounted Device) refers to LED chips that are mounted directly onto the surface of the strip. Common models include:
- 2835: The most popular choice right now
- 5050: High brightness, often used for RGB color-changing strips
- 3528: An older model with lower brightness
How to Cut
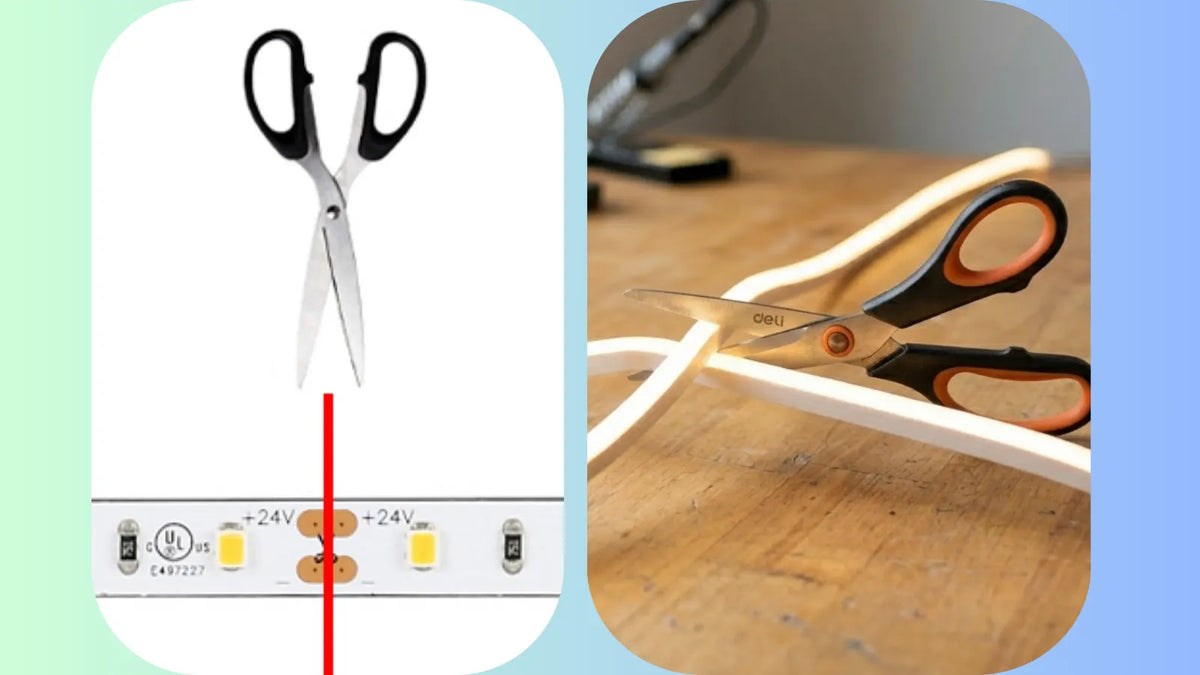
- Look for the scissors icon or copper solder pads printed on the strip surface.Cutting points usually appear every 2.5 cm to 5 cm (most often, one cut point per group of 3 LEDs).
- Always cut straight down the center of the scissors mark, making sure both sides of the cut keep a complete set of solder pads.

Key Details to Remember
- Never cut between marked points. Cutting anywhere else will break the internal circuit, causing the whole section—or everything after the cut—to stop working.
- If your strip has a waterproof coating (like silicone gel or a protective sleeve), you'll need to reseal the cut end with silicone sealant or heat-shrink tubing. This keeps moisture out and prevents the copper traces from oxidizing.
- For low-voltage SMD strips (DC 12V/24V), a wrong cut can't be easily fixed. Your only options are to re-solder the connection or replace that section entirely.
COB LED Strips (Chip-on-Board)
COB LED strips give off a smooth, continuous glow with no visible dots or gaps. The LED chips are packed tightly together and covered with a layer of phosphor gel, so the strip looks like one seamless line of light.
How to Cut
- Just like SMD strips, COB strips have scissors icons printed on the front or back. Cutting points are usually spaced every 2.5 cm, 5 cm, or 10 cm, depending on the brand and model.
- Simply cut along the marked line. After cutting, both ends will expose positive and negative solder pads, making it easy to reconnect later.

Key Details to Remember
- COB strips are highly flexible, so use sharp scissors and make one clean cut. Avoid snipping multiple times in the same spot—this can damage the internal circuits.
- Because the light output is continuous, cutting precision matters more. If you miss the mark by more than 1 mm, you could cause nearby chips to fail or create uneven brightness along the strip.
- Most COB strips use a high-density layout, which makes hand-soldering tricky after a cut. If you need to reconnect two pieces, we recommend using a dedicated COB connector instead of trying to weld them yourself—it's faster, safer, and more reliable.
CSP LED Strips (Chip-Scale Package)
CSP is a newer packaging technology where the LED chip is almost as small as the bare die itself. The light-emitting points on the strip are extremely tiny and densely packed, making CSP strips ideal for applications that demand perfectly even lighting with no hot spots or dark areas.
How to Cut
- Cutting marks work just like COB strips: look for icons every 2.5 cm or 5 cm, with visible copper solder pads at each mark.
- Always cut exactly along the marked line—no freehand trimming allowed.
Key Details to Remember
- CSP strips have ultra-fine internal circuits. If you press too hard while cutting, you risk separating the circuit layers. For best results, use a professional cutting tool instead of regular scissors.
- If your CSP strip has a waterproof nano-coating, you'll need to seal the cut end with UV-curable adhesive or the manufacturer's recommended sealant. Without proper end-cap protection, the coating won't provide full waterproof coverage.
- CSP strips often come in shorter circuit groups, meaning each cuttable section is relatively small. If you're planning a long installation, calculate your cutting points carefully ahead of time. This helps you avoid wasting too many sections due to misaligned cuts.
How to Cut LED Strip Lights With and Without Silicone Coating
Besides surface silicone coating, there's another common type of physical protection: flexible silicone tubing (also called silicone sleeves). With this design, the entire LED strip is inserted into a hollow silicone tube. This usually gives the strip a protection rating of IP67 or even IP68—meaning it can handle short-term water immersion. You'll often find these used for outdoor lighting, bathroom ambiance, poolside installations, and similar wet or damp locations.
When shopping for LED strips, some people buy bare strips (without silicone sleeves) and then DIY their own protective casing. But most users prefer to buy strips that come pre-installed in silicone sleeves. These pre-sleeved strips offer more even light distribution, no visible bright spots, and are generally easier to work with right out of the box.
Below, we'll first quickly recap the key cutting tips for non-sleeved strips (the non-waterproof or silicone-coated types we covered earlier), then walk through the step-by-step process for cutting flexible silicone-sleeved strips.
LED Strips Without Flexible Silicone Sleeves
This category includes both standard non-waterproof strips and silicone-coated waterproof strips. When cutting these, you cut directly into the strip itself—no outer sleeve to deal with.
Quick Recap of Steps
- Locate the scissors icon or copper solder pads printed on the strip surface.
- Use sharp scissors to make one clean cut right along the marked line.
- If your strip has a silicone coating, remember to seal the cut end afterward to keep moisture out.
Why This Type Is Easier to Work With
- Straightforward process—no need to remove or reattach any outer tubing.
- After cutting, the strip edge stays clean and neat, making reconnection simpler.
LED Strips With Flexible Silicone Sleeves
These strips have an outer layer made of translucent or frosted silicone tubing, with the actual LED strip (usually SMD or COB) wrapped inside. The silicone sleeve provides protection against water, dust, and UV rays—but it also makes the cutting process a bit more involved.
How to Cut
Step 1: Find Your Cutting Spot
- Some brands print cutting marks directly on the silicone sleeve itself.
- If your sleeve has no marks, look closely through the silicone to locate the scissors icon or solder pads on the LED strip inside.

Step 2: Work With the Silicone Sleeve
There are two common approaches here. Which one you choose depends on whether you plan to reuse the silicone sleeve after cutting:
| Method | How to Do It | Best For |
|---|---|---|
| Method A: Pull-Out Cutting | Gently pull the inner LED strip out of the silicone sleeve. Cut the strip itself at the marked point, then slide it back into the sleeve after cutting. | Longer strips with plenty of working space, or when you need to keep the sleeve's full waterproof protection intact. |
| Method B: Cut-With-Sleeve | Cut through both the silicone sleeve and the LED strip inside at the same time, right at the marked cutting point. | Shorter strips, or when the cut point is near the end—and you plan to add a waterproof end cap afterward. |
How to Fix LED Strip Lights After Cutting Them Incorrectly
Okay, not every cut goes perfectly. Sometimes, if you misjudge the cutting spot, the strip won't light up after you connect it to power. So what should you do in that case? Here are the most common scenarios and how to handle them.
Situation 1: You Cut at a Non-Marked Spot (Neither Section Lights Up, or the Back Half Won't Turn On)
This is the most common mistake. Inside an LED strip, the circuits are usually wired in a series-parallel combination, and each cutting mark lines up with a complete electrical unit. If you cut between these marks, you break the circuit loop inside that unit, which can cause:
- The small piece you just cut off won't light up at all
- The remaining longer section might also go completely dark—depending on how the circuit is designed, breaking one unit can interrupt power to everything after it
How to Fix a Wrong Cut
| Strip Type | How to Fix It |
|---|---|
| Non-Waterproof Strips | Find the nearest valid cutting point (where you see solder pads). Trim the strip cleanly at that mark, then use soldering or quick-connect clips to reconnect the strip to the power source or the next section. The small piece you cut incorrectly can't be saved—just set it aside. |
| Silicone-Coated Waterproof Strips | You'll still need to re-cut at a valid mark. Because the strip is covered in silicone gel, first use a small blade to carefully scrape away the coating at the cut end until the copper pads are exposed. Then solder or attach a connector, and finally reseal the cut end with silicone to restore waterproof protection. |
| Silicone-Sleeve Waterproof Strips | Gently pull the LED strip out of the silicone tube. Re-cut at a valid cutting point, then slide it back into the sleeve and seal the new end properly. Any extra sleeve material left from the original wrong cut can simply be trimmed off. |
Key Reminder: Don't try to "patch up" the strip at the wrong cut location. Non-marked spots don't have complete circuit nodes, so even if you solder there, the strip still won't work properly. The only reliable fix is to re-cut at a valid mark and reconnect from there.
Situation 2: Copper Foil Lifts or Breaks During Cutting
If your scissors aren't sharp enough, or if you cut at the wrong angle, the copper foil can peel away from the flexible circuit board—or the internal traces can snap. This issue most often happens near the edges of non-waterproof strips or silicone-coated strips.
How to Fix It
Slight lifting (foil not broken):If the copper foil is just lifted but still intact, use tweezers to gently press it back flat. Then apply a tiny drop of UV-curable adhesive or quick-dry glue on top to hold it in place. This helps prevent short circuits during later use.
Trace broken, but solder pads intact: If the circuit trace is broken but the solder pads on both sides are still there, you can bridge the gap with a thin wire. Solder one end to each pad. Keep your soldering iron under 300°C (572°F) and limit contact time to under 3 seconds to avoid damaging the LEDs.
Solder pads completely torn off:If the scissors mark area—and its solder pads—got cut away, that group of LEDs can't be fixed by soldering. Your best option is to skip that section entirely and reconnect starting from the next valid cutting point. The skipped section won't light up, so this workaround works best when exact length isn't critical.
Situation 3: Waterproof Layer Damaged but Not Sealed After Cutting
If you cut a silicone-coated strip or a silicone-sleeve strip and forget to seal the fresh end, moisture or water droplets can get inside. Over time, this causes the copper foil to oxidize and turn black—and in worse cases, it can trigger a short circuit that damages your power supply. Even outdoor-rated LED strip lights can't skip this step.
How to Fix It
Light oxidation (copper foil looks dull or darkened):Gently rub the oxidized area with a pencil eraser or fine-grit sandpaper until the copper shines again. Then immediately solder or attach a connector, and finally seal the entire cut end with silicone sealant or UV-curable adhesive.
Heavy oxidation or already shorted:If oxidation has spread to the LEDs or resistors, that section usually can't be saved. Best to replace the whole segment. To minimize waste, cut away the damaged part at the nearest valid cutting point and keep using the undamaged section.
Water leaking at the silicone sleeve cut:If the silicone sleeve cracked or got deformed during cutting, simply slide a waterproof end cap over the end. Fill the inside of the cap with waterproof sealant (we recommend 703 silicone or UV-curable adhesive), press the cap firmly onto the sleeve for a tight fit, and let it cure for 24 hours before use.
Situation 4: You Cut the Wrong Voltage or Type of Strip
Sometimes the problem isn't where you cut—it's what you connected afterward. For example: cutting a section of a 12V strip and plugging it into a 24V power supply, or connecting the cut end of an RGB strip to a single-color controller. These mistakes aren't about cutting location—they're about wiring the wrong components together. The result? The strip might not light up, glow too dim or too bright, or even burn out instantly.
How to Fix It
Voltage mismatch:Check the strip's rated voltage (12V/24V) and swap in a matching power supply. If high voltage already damaged the strip (blackened LEDs or cracked resistors), cut away the burned section and reconnect from a valid cutting point with the correct voltage.
Signal/type mismatch:Confirm your strip type—single-color, CCT, RGB, or RGBIC—and use the matching controller. Wrong wiring usually won't cause damage; just reconnect properly. For RGBIC (addressable) strips, always use a dedicated connector after cutting—standard soldering can break the signal or cause color glitches.
Situation 5: You Cut Too Short or Trimmed the Wrong Section
Sometimes after cutting, you realize the piece is too short—or you accidentally cut away a section you meant to keep.
How to Fix It
Not long enough:If you have leftover strip from the same batch, you can join two pieces together using soldering or quick-connect clips. When connecting, make sure the positive and negative pads align (look for "+/–" or "V+/V–" marks). For RGB strips, also double-check that the R/G/B signal lines match up.
Cut the wrong section:If the mistakenly cut piece hasn't been thrown away and the cut was made at a valid mark, you can simply use it as a standalone short strip. If the cut was in the wrong spot, follow the fix for Situation 1: trim both ends to the nearest valid cutting points, turning it into a usable (though shorter) section.
If you have more questions or need help with other technical steps, feel free to leave a comment or email us—our engineers will get back to you with fast, professional advice. We also welcome users and readers to share their own cases and tips. Your input helps us keep this guide updated and useful for more LED strip enthusiasts.