


Background: This spring, Lamomo launches its seasonal neon sign collection Spring Neon Signs – designed to bring nature indoors and spark fresh home decor inspiration. Crafted by Lamomo’s Nana, a passionate observer who finds magic in everyday moments, these neon signs capture spring’s vitality through minimalist yet lively linework. Below, we go behind the scenes with Nana for an exclusive look at her creative process and Lamomo’s sustainable production methods.
Question(Summer): How many new neon signs will be released this time, and what themes are they related to?
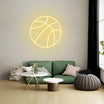
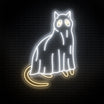
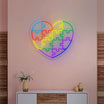
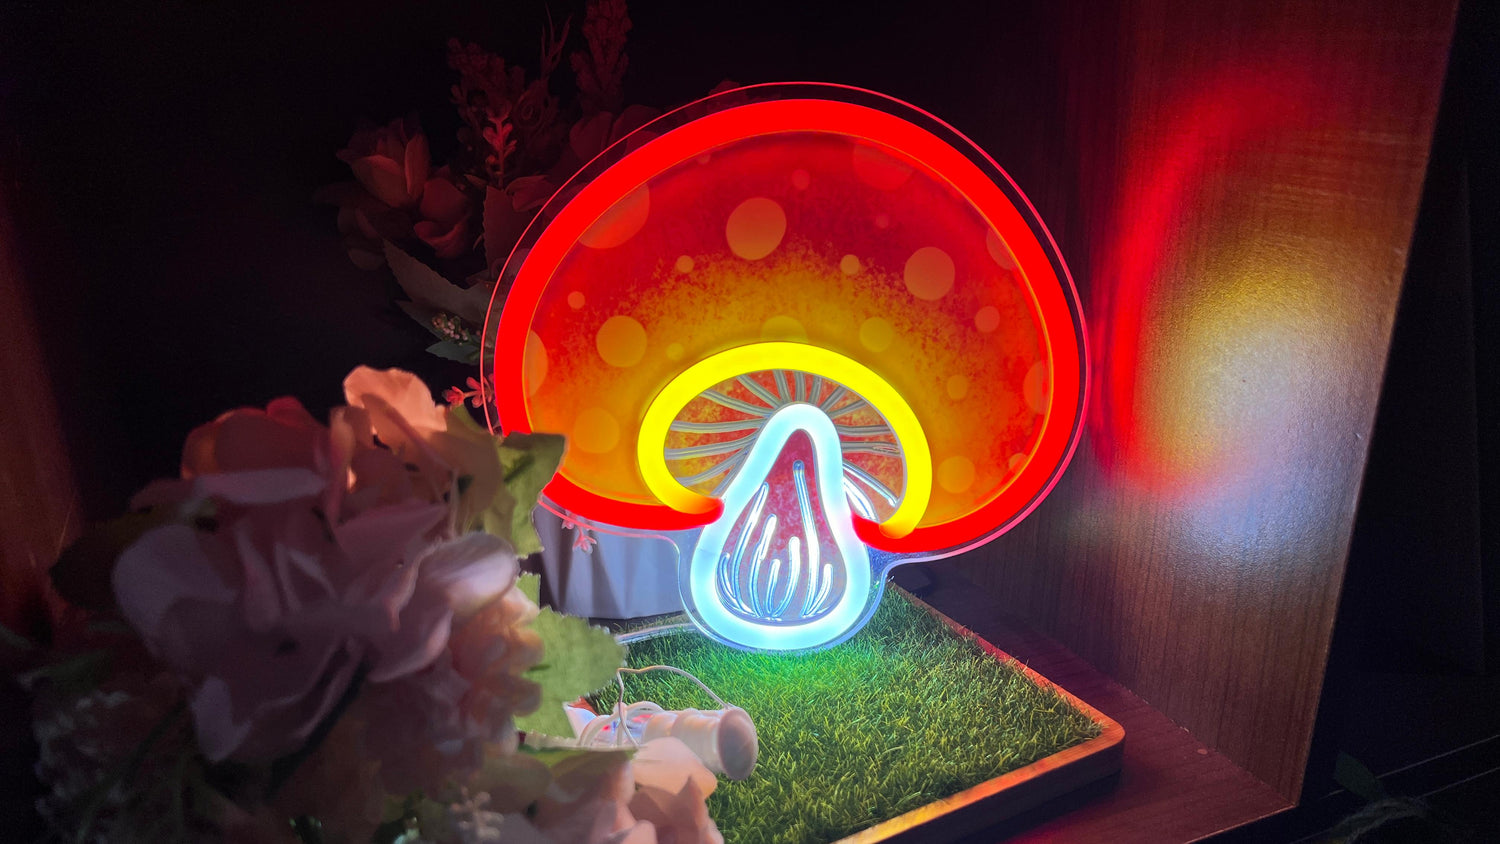
Answer(Nana): We're launching 12 new custom neon signs, all inspired by springtime magic! They’re divided into four themes: Mushrooms, Rainbows, Animals, and Plants.
Picture this: After a fresh spring rain, tiny mushrooms pop up across the forest floor, vibrant rainbow arcs over the sky, sleepy bunnies peek out from their cozy hibernation spots, and meadows burst into colorful blooms. That’s the springtime wonderland I adore—now glowing in neon!
Question(Summer): These new designs all began as your hand-drawn sketches – what sparked the ideas behind this collection?
Answer(Nana): First, I determined that these neon signs would be used close to the user, such as on desks, shelves, and bookcases. Our previous neon signs were often too large and grand, feeling distant from the user.
We wanted this spring-themed series to be within reach, perhaps on a bookshelf to remind you of the spring scenery outside while you're engrossed in reading, on a desk to add a touch of green while you work, or on a cabinet to welcome you home with a warm glow.
Once the usage scenarios were clear, I knew the designs needed to be simple, as complex shapes would result in oversized neon signs. I then observed popular decor elements for these areas on social media and sketched some drafts.
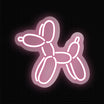
Some of the designs were very simple, but simplicity requires attention to detail. For example, the Outline Bunny Neon Sign design went through several iterations:
- V1 had a total gangster vibe – our factory designer traced my sketch photo, but lens distortion made it a slouch. The overall posture was too relaxed, and I wanted a more gentle and well-behaved appearance.
- V2 went full symmetry – too stiff. I wanted the rabbit to seem lively as if it could hop toward you at any moment. So, I asked the neon sign designer to adjust the angle of the right ear and left cheek.
- V3 was almost there. I popped open the vector file and nudged pen-tool anchor points – millimeter tweaks that gave it that 'living sketch' feel. That's the V4 charm you see now!

Question(Summer): When creating the initial hand-drawn sketches, did you consider the factors involved in the actual production of neon signs? Are there any tips for ordinary users who want to design their neon signs during the sketching phase?
Answer(Nana): Our neon sign designs consist of two main components: the LED strips and the backing board. The width of the LED strips is fixed, and they require a certain length to glow effectively. This makes it challenging to achieve intricate details, such as small circles or very short lines, using the LED strips alone. Given that these new Spring neon signs are designed to be smaller in size, how do we showcase the finer details? This is where our backing board comes into play.

Most neon signs use a transparent acrylic backing that doesn't add much to the design. However, our backing boards offer various finishes, including UV printing, Glossy Mirror, and Laser engraving. For example, the Flower Daisy Neon Sign design uses laser engraving to create the texture of the petals and the detailed rendering of the stamens. The Rainbow Flower Neon Sign design features a glossy mirror for the flower's stamens.


If you're interested in designing your own neon sign, it's crucial to determine which parts will be illuminated with the LED strips. For inspiration and guidance on backing board techniques, visit our customization page at Lamomoneon. You can also contact us for additional references and support!
Question(Summer): I understand that all design sketches need to be sent to the neon sign design team, who will create a mockup based on the hand-drawn images for the factory to reference. During this process, which design elements often need to be adjusted because they can't be realized?
Answer(Nana): In theory, any design can be achieved if the neon sign is made large enough, but you might end up with a sign as tall as a building and a hefty bill! Lol
Therefore, some elements must be represented using alternative methods like UV printing instead of LED strips. Common design elements that are challenging to realize include small circles, dots, dashed lines, and intricate patterns with many lines close together.
Don't worry—just send us your images, and we'll walk you through any difficult-to-achieve parts and provide solutions. Please stay in close communication with us during this process!
Question(Summer): Why were these elements modified? Was it because the factory couldn't produce them, or for another reason?
Answer(Nana): The main issue is that LED strips are designed with three lights per segment, and each segment must be at least 3cm long to have a soldering pad for wiring. Any design smaller than this cannot be realized with LED strips.
Question(Summer): With several dozen initial sketches, what factors do you consider when selecting the final 12 designs?
Answer(Nana): In the early stages of sketching, ideas flow freely, and many designs are rough and far from the final product. If you aim for perfection from the start, it's hard to get anything down on paper. So, the best approach is to draw freely and spontaneously. Lol


When selecting the final 12 neon sign designs, we considered several factors:
- Fan Votes: A big thank you to everyone who interacted with us on social media and voted for their favorite designs. While we couldn't turn every suggestion into a neon sign, we chose the most popular ones.
- Holiday Spirit: With Easter in April, we thought bunny elements would fit the holiday mood well. That's why we included two bunny-shaped neon signs. As for my personal favorite, the little bear, sorry—you'll have to wait for colder weather!
- Uniqueness: While our latest collection includes some basic neon sign designs like monstera plants and cherry blossoms - classic crowd-pleasers to round out our product lineup - the real magic lies in our signature pieces you won’t find anywhere else. Take our Arc Rainbow Neon Sign, a game-changer in the neon world. While every other brand sticks to predictable half-circle rainbows, we crafted ours as a quarter-circle. Why? This bold shape breaks from tradition to give you ultimate flexibility - layer it with other desk decors, flip it sideways, or stack multiples to create your own personalized arrangement. That’s the Lamomo difference: we create statement pieces others won’t dare to design, empowering you to break rules and redefine your space.

Question(Summer): How long did it take to finalize the neon sign designs, and how many revisions were made?
Answer(Nana): The entire process took about 5 days, from the time I sent the 12 initial sketches to the neon sign designer until the final designs were confirmed. The Rainbow Flower Neon Sign design underwent nearly 10 revisions, while simpler designs like the Monstera Leaf Neon Sign only required one revision. The high number of revisions was mainly due to my attention to detail, as I needed to confirm each line and element.

Question(Summer): Does the design of the neon sign affect its installation method? Conversely, do different installation methods have specific design requirements?
Answer(Nana): Yes, the design can influence the installation, primarily in terms of whether holes are pre-drilled for mounting. In this collection, four neon signs do not require drilling (see below). These neon signs will be installed using 3M adhesive strips by default.
We chose not to drill holes in these four designs for a couple of reasons:
- Aesthetics: Drilling holes requires leaving enough space, which can affect the overall appearance of the neon sign.
- Backing Board: These four designs have non-transparent backing boards, so the adhesive strips won't be visible.
While adhesive strips are easy to use, they do have limitations. They can't support much weight, so for larger neon signs, we recommend using wall screws or hanging wires.
Question(Summer): How does the final product compare to the design in terms of color and brightness?
Answer(Nana): Overall, we are quite satisfied with the final products. However, it's important to note that the LED strips emit very bright light, which can make the UV-printed areas appear darker in comparison. To achieve the best results, we recommend choosing brighter colors for UV printing during the design phase.

Question(Summer): To wrap up – what key details should someone focus on when designing their own neon sign?
Answer(Nana): For first-timers: Start by browsing our gallery to spark ideas. Then zero in on your hero element – is it the text or graphic? That focal point will use the LED strips, so nail down two things:
- Silicon Housing & Glow: Pick your neon color (we recommend matching the silicon housing to the light color, but go wild if you want – like our Sprout Plant Neon Sign design where warm-white lights shine through white tubing).
- Backdrop Magic: UV-printed panels aren’t just backgrounds – they’re where textures, gradients, or metallic foils can turn “cute” into “showstopper.”

Once those are locked in, here’s your reality-check checklist:
- Size: There can be a significant difference between imagined size and actual size, which is why many people are surprised by how large their neon sign is upon delivery. Pro tip: Grab a tape measure – know your wall’s exact width/height where you plan to place the sign.
- Indoor vs. Outdoor Use: Neon signs are electrically powered, so outdoor use requires waterproofing to prevent malfunctions during rain. If you plan to use the sign outdoors, select the outdoor option, and we'll ensure the LED strips are waterproof.
- Installation Method: The simplest installation methods are adhesive strips and Sticky Hooks, but these have size limitations. For storefront signs, consider wall screws or hanging wires. We have video tutorials for all these installation methods.
Here's the ultimate guide on how to hang a neon sign for your reference: Neon Sign Installation Guide: for Different Displaying Methods
Pay Attention: To thank our loyal customers, Lamomoneon is offering a special promotion on our new Spring Neon Signs collection.
Use code SPRING2025 for 20% off your order! Plus, enter our SPRING GIVEAWAY for a chance to win. The giveaway ends on March 31st. We can't wait to see your favorites! Check out the details below and join in the fun: https://www.instagram.com/p/DHbcRlCq1zz/

Plus, If you want to have your own designed neon signs, work with Lamomoneon, custom your text or graphic to neon signs any time.