


Table of Contents
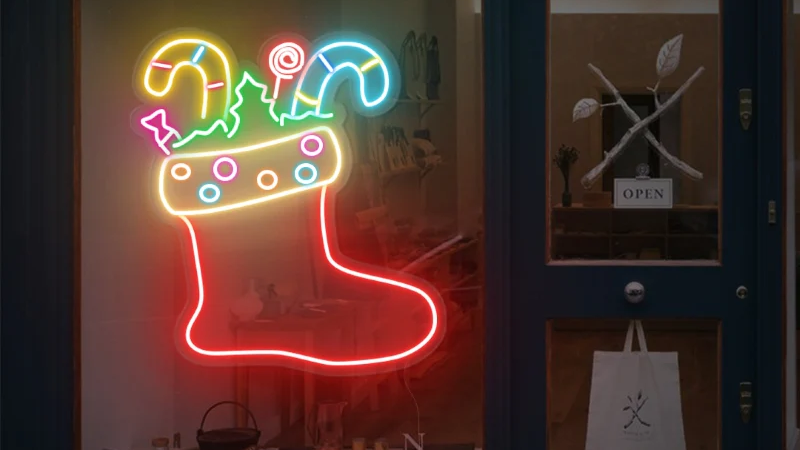
Neon signs are remarkably reliable and versatile. They have been used to illuminate and decorate businesses and as artwork in different settings for over a century. When properly installed and maintained, neon signs can function continuously for many decades without breaking and needing minimal maintenance.
However, sometimes neon signs malfunction; when they do, you need to know what is wrong and how to fix them safely. Troubleshooting and repairing a broken or malfunctioning neon sign is not that hard, as you shall see in this guide. Common issues you can DIY-repair in neon signs include physical damage, transformer or power supply failure, flickering etc.
Neon signs currently fall into two main categories: traditional neon signs and LED neon signs.
Traditional neon signs are primarily made up of glass tubes, electrodes, and gas. The glass tubes are shaped into various forms and text, then vacuum-sealed and filled with small amounts of inert gases. For example, neon gas produces red light, argon emits blue light, and other colors are achieved through gas mixtures or fluorescent coatings. When high-voltage electricity passes through the electrodes, the gas ionizes and glows.
LED neon signs (also called flexible neon light strips or LED neon lights) are a modern upgrade to traditional neon, combining LED technology with flexible materials. They retain neon’s iconic glow while addressing issues like high energy consumption, fragility, and difficult maintenance. When powered, LEDs emit light as electrons transition within semiconductor materials. A silicone casing diffuses the light to replicate the seamless glow of traditional neon tubes. RGB LEDs enable full-color effects through color mixing.
While the use of traditional neon signs is declining, some businesses still opt for their premium, vintage aesthetic, making maintenance and repairs essential. Meanwhile, LED neon signs dominate the market today due to their mature manufacturing technology, though they also require careful upkeep over time. This article breaks down both categories, offering detailed maintenance and repair guides for traditional and LED neon signs. No matter which style you choose, you’ll find trustworthy, practical advice here.
LED Neon Sign Troubleshooting and Repair Guide
Common Fault Categories & Troubleshooting
1. Light Strip Lights Not Lighting Up
Possible Causes:
- Power supply issues (faulty adapter, outlet problem).
- Damaged controller or power cable.
- Internal wiring break or short circuit in the light strip.
Troubleshooting Steps:
- Check the power supply: Ensure the outlet is working and the adapter’s indicator light is on.
- Test the adapter: Use a multimeter to verify the output voltage matches the labeled value (e.g., 12V/24V).
- Inspect connections: Confirm the power cable is securely attached to the light strip’s port, with no looseness or oxidation.
- Segment testing: For long strips, disconnect the rear half and test the front half to isolate the faulty section.
2. Partial Sections Flickering or Not Lighting
Possible Causes:
- Damaged LED chips or circuits in a segment.
- Poor contact at connectors (loose solder joints, oxidized plugs).
- Insufficient power supply (voltage drop due to excessive strip length).
Troubleshooting Steps:
- Identify the faulty section: Note which segments flicker or stay dark.
- Check connection points: Inspect junctions (clips, solder points) for oxidation or looseness. Clean and resecure.
- Upgrade the adapter: Use a higher-wattage power supply or split long strips into shorter, separately powered sections.
- Replace damaged segments: Cut out the faulty section (at marked cutting points) and replace it with a same-spec light strip.
3. Color Abnormalities or Failure to Change Colors
Possible Causes:
- Controller settings error or signal transmission failure.
- Defective color channel in RGB LEDs.
- Moisture damage or corroded circuitry.
Troubleshooting Steps:
- Reset the controller: Disconnect power, reconnect, and restore default settings.
- Test the remote/app: Replace remote batteries or check for wireless signal interference.
- Check single-color modes: Use the controller to cycle through solid colors (red/green/blue) to pinpoint faulty channels.
- Weatherproofing: For outdoor strips, inspect seals for damage and reapply waterproofing measures.
LED Neon Sign Repair Methods & Tools
1. Basic Tool Preparation
- Multimeter (for checking voltage/continuity).
- Soldering iron & solder (to fix broken connections).
- Electrical tape & heat-shrink tubing (for insulation).
- Spare adapters & replacement light strips (for testing/swapping).
2. Common Repair Procedures
A. Fixing Broken Light Strip Sections:
- Locate the break: Identify the start of the non-functional section.
- Repair the break:
- Solder the disconnected copper traces with a soldering iron.
- For temporary fixes, use conductive adhesive. - Insulate the repair: Cover the soldered area with heat-shrink tubing or electrical tape.
B. Replacing Damaged Segments:
- Cut at marked points: Trim the damaged section along the designated cutting marks.
- Install a new segment:
- Use waterproof connectors or soldering to attach the replacement strip.
- Ensure correct polarity alignment (marked “+/-” or color-coded).
C. Controller Troubleshooting:
- Swap controllers: Test with an identical model if available.
- Reset/update smart controllers: Restore defaults or install firmware updates.
Traditional Neon Signs Troubleshooting and Repair Guide
Common Issues and Solutions
The following are the most common issues affecting neon signs and how you can go about diagnosing and repairing them at home.
Neon Sign Not Lighting Up
As mentioned earlier, neon signs, whether traditional or modern, are quite reliable – more reliable than most other light sources. It is why, for example, you can find a classic neon sign from the 70s and 80s still lighting up an old bar or alleyway this many years later. However, in the occasion that you have a neon sign that fails or refuses to light up, this is what you need to do:
1. Check the power source
In most cases, a neon sign that refuses to light up has a problem with the power source. The problem could sometimes be as simple as a disconnected plug or switch not turned on. As the first step, you should ensure the neon sign is properly connected to a functioning outlet. Ensure the power switch at the outlet and the neon sign is turned on as well.
To ensure you are not dealing with a malfunctioning power outlet, trying plugging in something else (like a phone charger for instance) and ensure it is working or use a current tester to check for current. Also check if the switch is working properly or of it is loose, broken or stuck in the OFF position.
2. Inspect the Fuse
If the neon sign is properly connected to a working power source, the next step is to inspect if there is a blown fuse.
Warning: Safety! Make sure you disconnect the neon sign from power before working on it.
To do this, you’ll need to locate the fuse within the sign's power supply unit, remove it, and visually inspect it for signs of damage like a broken wire or blackened area within the glass casing. If you can't see clear damage, use a multimeter set to continuity mode to test if current can pass through the fuse - a lack of continuity indicates a blown fuse.
Neon Sign Repair: Replace the faulty fuse with a working. You can buy individual fuses for most neon signs online or at your local electronics store using the model number. Just make sure you are replacing the fuse with the correct type and amperage.
Tip: If the fuse is not the problem, you may need to check for other potential issues like loose connections, damaged transformers, or faulty neon tubes within the sign that blew the fuse in the first place.
3. Examine the Wiring
Another issue apart from a blown fuse or bad connection is the wiring. Examine the Wiring. Look for loose or damaged wires inside the neon sign. Sometimes copper wiring can get damaged over time, by pests, or a power surge. You can use a multimeter to check for continuity or just scan visually in some cases.
Neon Sign Repair: If you are comfortable using a soldering iron and know what you are doing, remove the damaged wiring and install new wires of the same type. As always, ensure the neon sign is not connected to any power source while you do this.
Neon Sign Flickering or Dim Light
Flickering or dimming light is one of the most common problems you will experience with old neon signs. Here is how to troubleshoot and fix it:
1. Check for Loose Connections
To diagnose the problem, start by checking if there any loose connection inside the neon light and outside. Check the internal wiring as well as the external wiring going to the power source for lose connections. It is also possible that the problem could be coming from power outlet or main grid in case of a brownout.
2. Inspect the Transformer
Next, open the neon sign and check the transformer if you understand how to diagnose electrical components. Ensure the transformer is working properly and replace it if it faulty. If unsure, take the neon sign to a repair shop for detailed diagnosis and repair.
3. Check for cracks or leaks in neon tubing
Traditional neon lights use neon tuning as lighting component that can fail from time to time. Visually check the neon tubing for cracks or leaks and replace it with a new one if you have one or order online. Changing neon tubing is a bit technical so you might want to consult an expert if you have never done it before.
Neon Sign Partial Lighting
Sometimes the neon light could be lighting up on one side and dark on other parts. Here is how to diagnose and fix this issue:
1. Inspect the Neon Tubes
Check that are no broken or damaged sections along the neon tubes on the sign. Replace the entire tube if there are damaged sections.
2. Check the Electrodes
Ensure electrodes are clean and properly connected. Electrodes are metal conductors placed at each end of the glass tube, which are used to facilitate the flow of electricity through the noble gas inside the tube, causing it to glow when a voltage is applied. Reference from Wikipedia
3. Examine the Wiring
Look for loose or damaged wires affecting partial sections. You may need to replace the entire wiring affected even if the sign is lighting up partially.
Neon Sign Buzzing or Humming Noise
1. Check the Transformer
Check and ensure the transformer inside the neon sign is securely mounted and there is no vibration against other components.
2. Inspect the Wiring
Look for loose or damaged wires causing interference.
3. Examine the Mounting
Ensure the neon sign is properly mounted to prevent vibrations.
Neon Sign Overheating
Some neon lights can start overheating which can cause other problems with time. Here is how to diagnose and fix this issue.
1. Check the Ventilation
Ensure there is adequate ventilation where the neon sign is mounted.
2. Inspect the Transformer
Ensure that the transformer is not overloaded and is functioning properly
3. Look for Faulty Components
Check for components causing excessive heat
How to Repair A Traditional Neon Sign
The easiest way to repair a neon sign is to troubleshoot the problem first and then fix it. For instance, if you find a blown fuse, you need to find a new one and replace it. Some fixes are easy and only require simple tools – like replacing a fuse.
Other problems are much more complex and may require you to use a soldering iron to remove components and solder new ones on. Only attempt advanced repairs if you are good with electrical work and know what you are doing.
Seek Professional Help (Persistent issues after DIY repairs)
Sometimes your neon signs may have complex or persistent problems that are hard to fix at home. Perhaps it is a faulty transformer you cannot fix or a fuse you cannot locate and replace.
If unsure about what the problem is or can’t find a spare part, look for a neon sign repair shop or search online for neon sign repair near me. Neon sign repair cost is usually quite minimal so don’t damage your sign trying to DIY-repair it if you don’t know what you are doing.
Maintenance Tips for Neon Signs
Proper maintenance of a neon sing involves the following:
1. Regular cleaning
Ensure you dust the neon tubes with a soft and dry cloth once a month. This will prevent dust and grime building up.
2. Checking the Electricals
Regularly inspect the electricals including wiring and the transformer. Check for fraying, wear and damage on the wires and overheating or noise from the transformer.
3. Mounting Location
Make sure the neon sign is mounted in a good place away from direct sunlight. Also protect it from extreme temperatures and humidity if it is not rated for outdoor use.
4. Professional Maintenance
If you have several neon signs installed in a commercial setting, it is advisable to always have a professional service them from time to time. They should check for damages and replace any parts that need replacing.
Professional Support from Lamomo Neon
Lamomo Neon is a professional neon design, customization company. Lamomo Neon has an able and well-equipped support team that can guide you on how to repair neon signs of all types, sizes and designs. They can help deal with all types of issues you may have with your signs including dead transformers, blown fuses, broken LED lights etc.
The team can be reached on email at support@lamomoneon.com and other contacts available on the company website.
Lamomo Neon is a top neon sign customization company. Get your neon signs in any design you want by accessing the online design tool on the company website. Shop Lamomoneon today and get a solution for all your neon sign-related issues.

